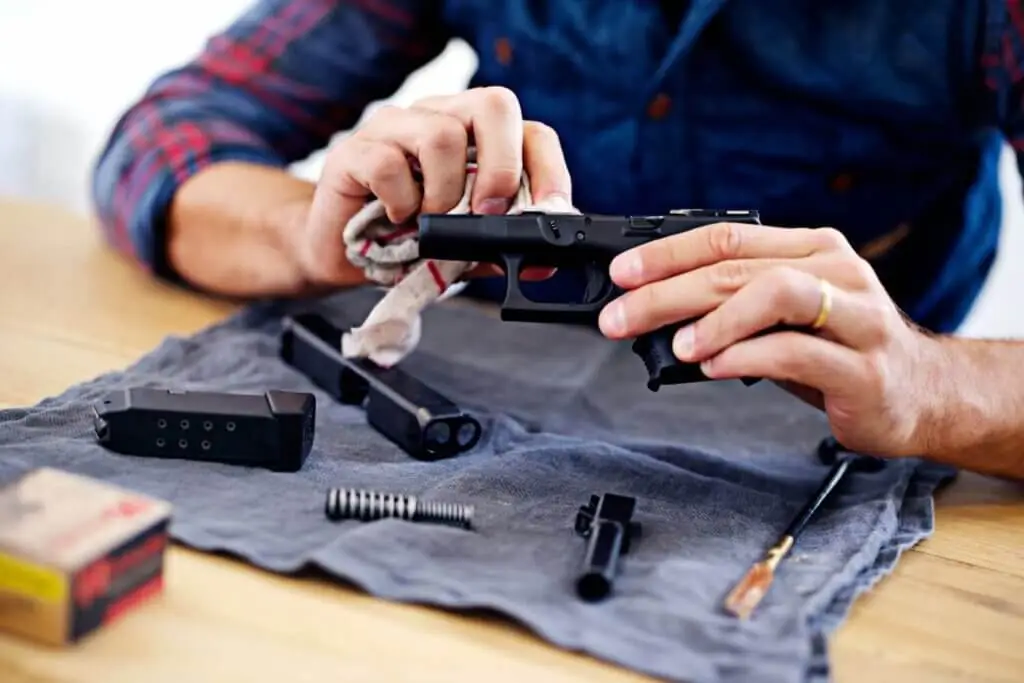
Overhead view of a man cleaning his disassembled firearm

Tips for Cleaning Your DIY Firearm

Cleaning a gun is part of basic gun maintenance, and it’s especially rewarding when working on DIY firearms. When you take the time to build a custom firearm (or modify a commercial model to suit your shooting needs better), you’re developing detailed knowledge of the gun you’ll be using. This makes it a better choice for the range, everyday carry, or self-defense while also giving you a sense of satisfaction and helping you maintain your privacy against the intrusive paperwork that comes with commercial firearms transactions. Proper gun usage and care isn’t just a privilege of your Second Amendment rights but also the responsibility of every gun owner.

Before You Get Started Cleaning a Gun

Safety always comes first with firearms. That means you need to take the necessary precautions to ensure you’re protecting yourself, those around you, and your weapon throughout the process. 
  • Make Sure It’s Unloaded – Unload the firearm, removing its magazine, if applicable. Next, check the chamber visually, ensuring there’s no round loaded. Repeat this process whenever the gun leaves your sight or immediate custody while assembled. DIY firearms can be extremely interesting, and all it takes is one curious but well-meaning person to put lives in jeopardy while you aren’t looking.
  • Clear Some Time – Of course, the easiest way to ensure no one has unsupervised access to your gun is to make sure there’s plenty of time set aside for cleaning a gun from start to finish. This also has the benefit of not leaving your gun’s internals open to the air and potential dust contamination any longer than necessary.
  • Prepare Your Work Area – Clear out any area, clean up the space a little, and lay out your gun cleaning mat or a tarp to catch stray solvents and keep dirty parts from sitting directly on your work table. Make sure there’s plenty of airflow and ventilation, but no open flames.
  • Make Sure You Have the Right Tools and Accessories – Take the time before getting your gun out to gather your equipment. Ensure your cleaning kit, tools, solvents, oils, and protectants are close at hand to your workstation and that you don’t need to run out to refill any of the cleaners you’re using. Don’t forget your PPE! Solvent in your eyes can sting and even cause permanent damage.

Getting Started

This image has an empty alt attribute; its file name is JaL_lST8eWg9k9BpuqNkpfsmqhlrWNgGmvkDMCAF_ppyk75OLqRDY3db7oI_KICh9s59iTaglSxWemL1HZxE12EQTDFPQCjGchtTNarWQFuwhvCjJVCNkU2icGxzDLawLCRwJSuMs8GVqVG0aOF5JKM

Cleaning a gun usually doesn’t require complete disassembly. A simple field stripping of the firearm is sufficient to let you get to the areas you need to clean during regular maintenance. If you have a commercial firearm and you aren’t sure how to field strip it, refer to your owner’s manual. With DIY guns, you built the weapon with your own two hands, so you got this. 

  1. Initial Wipe Down – Start by using a nylon-bristled brush or toothbrush to gently remove large debris, dust, and detritus from the components, and then wipe every surface you can reach with a clean, lint-free cloth to remove oily residue and smaller debris.
  2. Apply Solvent – Next, spray or dab your preferred solvent liberally on a cloth or patch and use it to apply solvent to the internal surfaces of your slide and frame, barrel exterior, fire control group, and any components that were removed by the field striping process, such as guide rods and recoil springs. Saturate a cleaning patch with solvent and push it down your barrel with a cleaning rod one time as well.
  3. Be Patient – Wait a few minutes for the solvent to do its job. Powders, oils, and other residues can harden, and it takes time for the solvent chemicals to loosen their grip on your firearm’s surfaces. That’s enough time to check in on our YouTube page for the latest videos about DIY firearms.
  4. Scrub-A-Dub-Dub – Use your nylon brush on every surface you can reach to loosen and remove particulate.
  1. Clean the Barrel – Wet some new patches with cleaner and push them through the barrel of your weapon with a cleaning rod. If you gave the solvent enough time to do its job, a wire brush may not be necessary, but if there are stubborn deposits, using a copper bore brush will help loosen them. Never switch directions with the patch or brush inside the barrel when cleaning a gun! Push it all the way through and then bring it back all the way through. Continue to run new wet patches through the barrel until they come out clean. 
  1. Clean the Rest – Wet a cloth with some cleaner and wipe down all surfaces of your slide, frame, fire control group, and other components.
  2. Apply Lubricant – Apply a thin layer of lubricant anywhere your weapon components, pivot, move, slide, or touch. Remember that a little goes a long way. Extra grease or lubricant doesn’t make the gun work better, but it does attract dirt and dust better, potentially introducing grit that can harm your weapon.
  3. Reassemble Your Weapon – Put it back together following your manufacturer’s instructions or your own know-how if you’re a DIY firearms owner. Test out its function while it’s unloaded by manually cycling and dry-firing the weapon. If any components are out of place, you want to find out now, not when you’re shooting.

A Few Last Tips For Cleaning A Gun

Once you get the hang of it, cleaning a gun can be an enjoyable part of the hobby that takes less than an hour. As you get more familiar with your weapon and the process, keep these tips in mind.

  • Some cleaning tools are caliber-specific, so if you plan on getting a new gun, plan on getting the right bore brushes to go with it.
  • Cleaning a gun is the perfect chance to spot damage before it becomes an issue. From cracks to pitting or more play than usual from a spring, these can indicate it’s time to consider replacement parts. With DIY firearms, that just gives you another excuse to tinker.
  • It’s also the perfect chance to evaluate customization opportunities. Why not add a pull-release trigger, precision optics, or a high-performance barrel?
  • This can also be a great chance to introduce guns to family members who may be intimidated by firearms out of ignorance. Invite them to get comfortable with the tool piece by piece, and they might just be ready to join you at the range.

High-Performance Gun Parts and Accessories

Since 2013, we’ve had you covered with gun parts and accessories that make customization or building DIY firearms easier. Sign up for our newsletter to get the latest deals delivered to your inbox first. Order your parts from JSD Supply today.